Monday

Christmas in July

No this isn't a mirage in the heat....I have actually blogged today LOL!


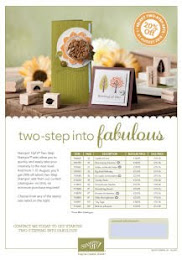
I really enjoyed July's Stampers 10 project using Serene Snowflakes. This set really is so elegant.

The card holder was made using a template from the extremely talented Jo Dumbleton over at Stampin' n' Stuff. There is a cutting/scoring template over there as well giving all of the measurements.

I will be back on Wednesday with  a completely up to date blog... I will be posting the missing months (blushing and feeling embarressed right now!) and a challenge!

Well, I am heading off shortly to get some new storage for my office. I am so looking forward to getting my stash organised

Take care and I will see you here on Wednesday x

Wednesday


I have been asked to offer a 'Sampler' of the new products this month.

Here are the details:

6 sheets each of Rich Razzleberry, Melon Mambo and Soft Suede cardstock
2.5m each colour of polka dot ribbon (RR,MM and SS)
12 sheets of 6"x6" Cottage Wall designer paper
1 piece of 6"x6" Flower Fantasy window sheet
An inkpad in each colour - Rich Razzleberry, Melon Mambo and Soft Suede

All of this for £24

Send me an email, leave a comment or ask at the meeting if you want to order a sampler.

Take care


Monday

May Meeting...

A quick reminder about this weeks meetings - Tuesday at 6.30pm or Thursday at 10.30am

Michelle Collins is this months hostess.

Techniques will include ways to use re-inkers.

Just bring along a basic kit - scissors, sticky tape, etc.

April Meeting

At the April meeting we used the reverse marking techniques to make the following card:


We made  a card using All a Flutter from the mini catalogue, complete with 'vintage' flower: 


We also used the faux wood technique to make a little birdhouse gift box.


Here is the template for the birdbox...


See you next meeting...


Thursday

As promised here are the details of the eyelet border punch flower. It looks beautiful and so easy to do.

These photos were taken by Linda heller, a US demo, at their regionals in January. This is now one of the hottest flowers about at the moment. There ia also a vifeo on the link above.

excerpt from Linda's blog:
Jan McClurg demonstrated on stage and I snapped a few pics (click to enlarge): Created by Toni Ballesteros
She used the Stampin’ Up eyelet border punch and then ran it thru the crimper several times.   She punched a circle, 1-3/8 or 1-3/4 (can’t remember) and covered it with Sticky Strip tape.  Then she scrunched and pleated and ran the paper on the sticky circle til it stopped in the middle.

I am going to have a try tomorrow, I think they are gorgeous! I will post the info from todays meeting tomorrow when I have a better light for photos.

Thank you so much for coming over today,


Monday

March Meeting

I just wanted to remind everyone that the next meeting will be on Thursday 11th March at 10.30 am.

We will start our technique 'books' in March as well.

 Oh and I have transferred some of the old posts onto this blog...click on 2009 group above to view. I will try and fill in the gaps over the next coupple of weeks.

Looking forward to seeing you at the meeting...

Tuesday

February Meeting

Hi and welcome to the new Stampers 10 club and blog.

This month has been pretty crazy and I would like to say a massive thank you for your patience with me!

Well I made the most of the last few days of Sale-a-Bration and we used Happy Moments and Whimsical Words and some lovely bright Spring like colours...the weather will hopefully follow suit and be 'Spring like' soon!
As promised here are the directions for the gift card holder:


Gift Card Holder

Taken with Teal c/s 8” x 4¾”
Cameo Coral c/s 4½” x 3¾”
envelope
sticky velcro
grosgrain ribbon 5”
cardstock  and tab punch for insert
All in the Family, Curvy Verses and Whimsical Words (SAB) stamp sets

  1. Using VersaMark ink pad, stamp the polka dot image onto the Cameo Coral cardstock. Trim this piece along smallest edge at 3” giving you  two panels.
  2. Stamp sentiment onto largest Cameo Coral piece.
  3. Stamp cake image white cardstock, the colour using favourite colouring technique.
  4. Punch out image using 1¾” circle punch. Set aside.
  5. Score Taken with Teal cardstock at 3¼” and 6⅝”.
  6. Punch a scallop edge along the top of the cardstock (small flap). Save the waste strip.
  7. Fix the waste strip from the scallop edge to the small piece of Cameo Coral cardstock along centre. You will need to trim the end.
  8. Fix Coral panels to the front of your GC holder as in example.
  9. Seal envelope then fold in half with seams facing outwards.
  10. Punch half circles in the middle of the smaller edges, then trim edges away.
  11. Apply sticky tape down the middle of the inside of the folded envelope and stick.
  12. Next apply sticky tape to both of the outsides of the envelope either side of the half circle.
  13. Attach folded envelope to the inside of the GC holder.
  14. Decorate insert as required.
  15. Finish the front by punching small holes using the crop-o-dile on the small flap
  16. and tying a simple bow.
  17. Attach cake image with foam pads.
  18. Finally attach Velcro.
  19. You should now have a cute little gift card holder that can be used for so many purposes if you change out the images and maybe even the size!
 Here are the pictures of the baby gift card holder that I had also made:


Take care